Military Discount
 -

-

-
0

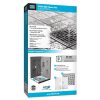
The HYDRO BAN® Shower Pan provides you with the convenience of a smaller, easier to handle multi-piece pre-fab shower pan for waterproofing shower applications.
Price range: $68.54 through $159.38
Item No.: 9243-3260-CDP
attribute_pa_size: 32-x-60-center-drain-pan
Item No.: 9243-7272-CDP
attribute_pa_size: 72-x-72-center-drain-pan
Item No.: 9243-4872-CDP
attribute_pa_size: 48-x-72-center-drain-pan
Item No.: 9243-3260-OCDP
attribute_pa_size: 32-x-60-offcenter-drain-pan
Item No.: 9243-4848-CDP-BF
attribute_pa_size: 48-x-48-cdp-barrier-free
Item No.: 9243-4848-CDP
attribute_pa_size: 48-x-48-center-drain-pan
The HYDRO BAN® Shower Pan provides you with the convenience of a smaller, easier to handle multi-piece pre-fab shower pan for waterproofing shower applications. Uses include industrial, commercial and residential bathrooms, as well as stalled gang showers and pet showers where a pre-sloped shower is required.
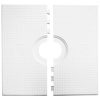
One of the best easily installable shower pans available in the market, the Laticrete hydro ban shower pan is a lightweight, high-density, rapid installation shower pan widely preferred by builders and homeowners. The product is ready to tile and comes with its assembly of installation kits. It is also fully waterproof. The shower pan comes in custom sizes and shapes.
Creating a perfect floor for your shower is a simple and easy process. And the Laticrete hydro ban shower pan can make it convenient for you to handle many pre-fab shower pan pieces that help in waterproofing the shower applications.
Let us find out more about the same under the following sub-heads below-
So, let us take one sub-topic at a time here.
Features of Laticrete Hydro Ban Shower Pan
Having seen the features of the Laticrete shower pan, let us find out more about the Laticrete Hydro Ban Shower Pan installation.
Hydro ban shower pan installation
Notes to Remember
The Laticrete Hydro Ban Shower Pan is one of the most sought-after products preferred by homeowners and builders. It is waterproof and is available as ready-to-tile equipped with an installation kit. The shower pan is available in different shapes and sizes for customization.
To determine approximate delivery time for your order shipped via UPS Ground, please locate the zone where the Ship-To address for your order is located. Note the color of that zone then check the number of days listed next to the color in the Transit Days Chart on the bottom right of the Zone Map. Please note that the delivery time is calculated beginning the day after your order has shipped.

The Laticrete Hydro Ban Shower Pan has many features that make it a highly versatile product for shower stalls of varying designs. Below are some of those.
Uses
Advantages
Suitable Substrates
How to Install a Hydro Ban Shower Pan
Installing the Laticrete Hydro Ban Shower Pan is easy. It only involves a few quick steps that any practiced installer can accomplish in less time. Here is how the pan can be installed in a shower stall.