
 Military Discount
 -

-

-
0

Tile spacers are small pieces of plastic or rubber that allow you to achieve consistent spacing between your tiles when installing a floor or wall, guaranteeing your grout lines are even. Tile spacers come in a variety of different shapes and sizes, and help to make your finished product look incredibly professional.
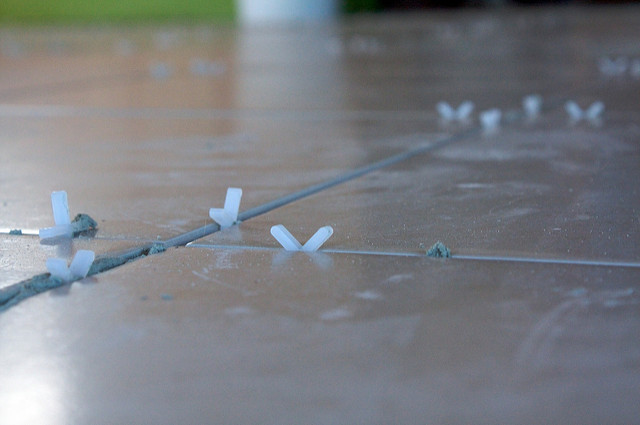
Some of the main types of tile spacers are ‘T’ shaped, cross shaped, and horseshoe shaped, and each has their own purpose. ‘Checkerboard’ like patterns are best achieved with cross shaped flooring spacers, while ‘T’ shaped tile spacers are best for more irregular, offset patterns. Horseshoe spacers are perfect for wall installations, because they hold their shape and don’t cause grout bulging.
When it comes to choosing the correct size of tile spacer, it depends on the type of tile you’re installing. Smaller tiles, up to 8 x 8 inches, typically have a 1/32” or 1/16” grout line, but tile consistency can cause that to fluctuate. 12 x 12” to 16 x 16” tiles typically have between a 1/16” and 1/8” grout line (the latter is usually used for flooring). Tiles larger than 16 x 16 can be a bit trickier, because you need to measure the tiles for consistency. If they’re consistent a 1/16” grout line is typically used, but you can go as small as 1/32”. Always be sure to account for inconsistent tiles that way you can avoid jogging in your grout and keep it looking professional.
Once you’ve selected your best tile spacers, it’s time to start the install. Here’s how to most efficiently use your flooring tile spacers:
There are also spacers for tile flooring that you can leave installed before laying your grout. These types of tile spacers have hollow spaces in the base to allow grout to fill in, ensuring proper bonding. Leave in spacers are ideal for larger format tile, and provide extra support.
At Tile Pro Depot we carry a variety of spacers sure to suit every tile job. We carry RTC spacers along with DTA tile leveling spacer systems, so your installs will always be symmetrical and avoid lippage. We understand using quality products makes for a quality job, so we only carry the absolute best. Using our selected products will leave not only the customer, but the installer satisfied as well.
Visit our website to place an order and to view our wide selection of products. If you have any questions, feel free to contact us online or by phone at 844.751.2625.
Welcome to Tile Pro Depot! We established this site to service the specific needs of the tile installation professional. Tile installation tools, tile setting materials, premixed grout and more tile installation products online at Tile Pro Depot.


