If you’ve ever attempted to remove old caulk from a shower or bathtub, you know it can be a pain. Oftentimes, it seems impossible to get the caulk to budge no matter how hard you try. This is especially true if the caulk has been there for years or if someone has applied it incorrectly. Fortunately, there is a tool that can make removing old caulk easier and more efficient. How to Remove Caulk from Tile and Grout
Identify the type of caulk you need to remove
To accurately identify the type of caulk you need to remove, it is best to visually inspect it. Different types of caulk have distinct appearances, textures, and characteristics that can help determine their type.
Here are some common types of caulks:
Silicone caulk: Silicone caulk is a popular type of caulk that is flexible and has excellent water resistance. It typically has a smooth, shiny finish and is available in various colors. Silicone caulk is commonly used in wet areas such as showers, sinks, and windows.
Acrylic caulk: Acrylic caulk is a versatile type of caulk that is easy to work with. It has a creamier texture and is available in different colors. Acrylic caulk is commonly used for interior applications such as sealing gaps or cracks around windows, doors, and baseboards.
Latex caulk: Latex caulk, also known as water-based caulk, is a common type of caulk used for interior applications. It is easy to clean up with water and typically dries quickly. Latex caulk is available in different colors and can be used to seal gaps and cracks around windows, doors, and other interior surfaces.
Butyl rubber caulk: Butyl rubber caulk is a highly durable and weather-resistant caulk that is commonly used for outdoor applications. It has a tacky, rubbery texture and is typically gray or black in color. Butyl rubber caulk is often used to seal joints in roofs, gutters, and other exterior surfaces.
By closely examining the caulk and considering its location and purpose, you should be able to identify which type of caulk you need to remove.
Prepare the area before you start removing old caulk
Preparing the area before removing old caulk is an important step to ensure a successful and efficient caulk removal process. Here are some steps to follow:
Gather the necessary tools: Before you start, make sure you have all the tools you will need for the caulk removal process. This may include a caulk removal tool, putty knife, scraper, razor blade, or heat gun depending on the type of caulk and surface.
Clean the surface: Use a mild detergent or an all-purpose cleaner to clean the area around the caulk. Remove any dirt, grime, or debris that may be present. This will help ensure a clean and smooth surface for the new caulk application later.
Protect surrounding surfaces: To prevent damage to adjacent areas, such as tiles or countertops, it’s a good idea to protect them before starting the caulk removal. You can use masking tape or painter’s tape to create a protective barrier along the edges of the caulk line.
Soften the caulk (if necessary): If the old caulk is stubborn or difficult to remove, you might need to soften it before attempting to remove it. This can be done using a heat gun or a caulk softening agent. Follow the manufacturer’s instructions for the specific product you are using.
Ventilate the area: If you’re using a caulk softening agent or a heat gun, ensure that the area is well-ventilated to reduce fumes and odors. Open windows or turn on fans to improve the airflow in the room.
By following these prepping steps, you’ll be ready to remove the old caulk efficiently and effectively without damaging the surrounding surfaces.
Choose the right tool depending on your specific needs and situation
There are several tools on the market that can effectively remove old caulk. However, the best tool for the job depends on the type of caulk and the surface you are working on. According to Bob Vila, some of the best caulk removal tools include:
Razor scraper: This tool has a razor blade that can be used to remove old caulk. It is ideal for flat surfaces and sensitive areas where you don’t want to risk damaging the surface.
Caulk removal tool: This specialized tool has a V-shaped tip that is designed to cut through and lift old caulk from the surface.
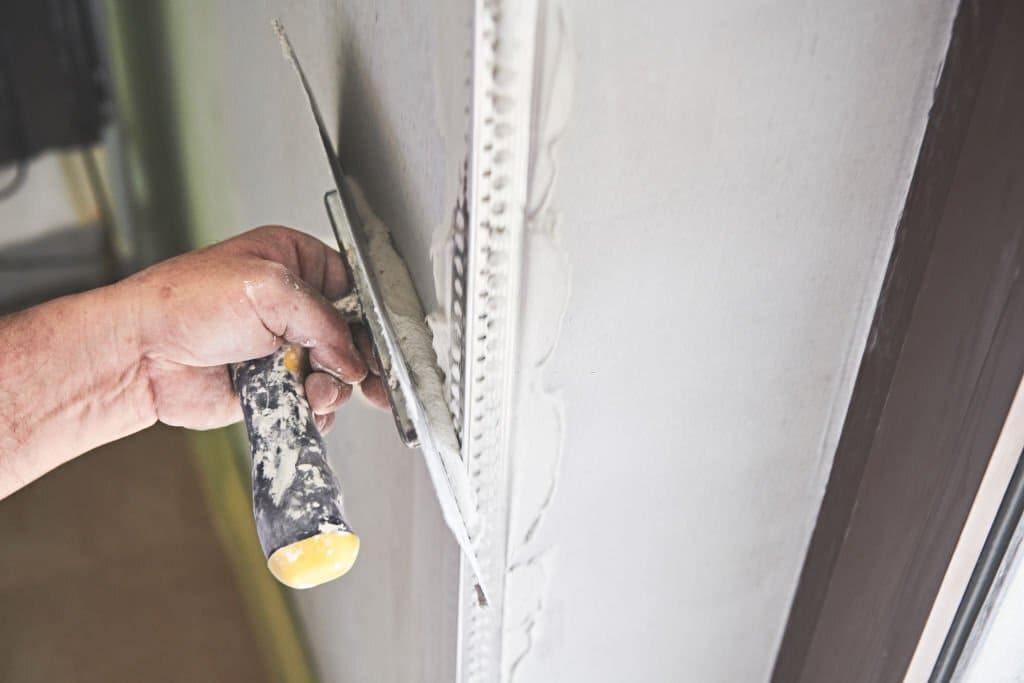
Putty knife: This type of scraper has a flat blade that can be used to remove caulk from wide areas. It is especially useful for removing large amounts of old caulk.
Oscillating multi-tool: This tool has a range of blades and attachments that can be used to cut and remove old caulk from various surfaces. It can be a versatile option for removing caulk from tight or hard-to-reach areas.
Heat gun: This tool uses heat to soften old caulk, making it easier to remove. It is ideal for removing old, dried-out caulk that is difficult to remove with other tools.
Learn how to use each type of tool properly to avoid damaging your surfaces
Certainly! Here are some tips on how to properly use each type of tool to remove old caulk without damaging the surfaces:
Razor scraper:
- Hold the scraper firmly at a slight angle to the surface.
- Apply gentle pressure and carefully scrape along the caulk line.
- Be cautious not to dig too deeply into the surface, as it can cause scratches or damage.
Caulk removal tool:
- Insert the V-shaped tip into the caulk line, with the flat side against the surface.
- Apply firm pressure and carefully push or pull the tool along the caulk line, allowing the sharp edge to cut through the caulk.
- Avoid pressing too hard, as it can gouge or scratch the surface.
Putty knife:
- Hold the putty knife at a low angle against the surface.
- Use smooth, even strokes to gently slide the blade under the caulk and lift it off.
- Exercise caution to avoid applying excessive force, which can scratch or damage the surface.
Oscillating multi-tool:
- Select a suitable blade or attachment for caulk removal.
- Angle the tool to get access to the caulk line.
- Use a slow and steady motion to cut through the caulk.
- Be careful not to press too hard, as it can damage the surface or surrounding materials.
Heat gun:
- Set the heat gun to a low or medium heat setting.
- Hold the heat gun a few inches away from the caulk line.
- Move the heat gun back and forth across the caulk to evenly heat it.
- Once the caulk becomes soft, use a scraper to gently lift and remove the softened caulk.
Remember to always exercise caution and take your time when using these tools. Practice on a small, inconspicuous area before proceeding to larger sections. This will help you become familiar with the tools and minimize the risk of accidental damage to the surfaces.
Follow safety precautions when removing old caulk
Safety is always important when removing old caulk. Here are some general safety precautions to follow:
- Protective gear: Wear appropriate protective gear such as safety goggles or glasses to protect your eyes from debris or caulk particles. Additionally, gloves can help protect your hands from sharp tools or caustic chemicals if used.
- Ventilation: Ensure that the area is well-ventilated to minimize exposure to fumes or odors. Open windows or use fans to improve airflow and prevent inhaling potentially harmful particles or chemical odors.
- Stability: Use a stable and secure footing or ladder to reach the caulk, especially if you need to work at heights. This helps prevent falls or accidents while removing caulk from elevated surfaces.
- Sharp tools: Handle sharp tools such as razor scrapers or putty knives with care to avoid accidental cuts or injuries. Ensure that the blade is properly secured and not loose or wobbly.
- Electrical safety: If using a heat gun or any electrical tool, follow manufacturer instructions and safety guidelines. Avoid using damaged or frayed cords, use appropriate extension cords, and unplug the tool when not in use.
- Chemical safety: If using chemicals such as caulk softening agents or solvent-based removers, follow the manufacturer’s instructions for proper usage, ventilation, and disposal. Some chemicals may be hazardous, so it’s essential to handle them safely.
- Clean-up: After removing caulk, clean the area properly, disposing of any debris or residues. Keep the work area tidy and free from tripping hazards.
These are general safety precautions, but it’s crucial to consider specific guidelines or recommendations provided by manufacturers for the tools and products you are using. Always prioritize your safety and take the necessary precautions to avoid accidents or injuries.